Monday, December 19, 2016

It's not too late to make a few christmas gifts!

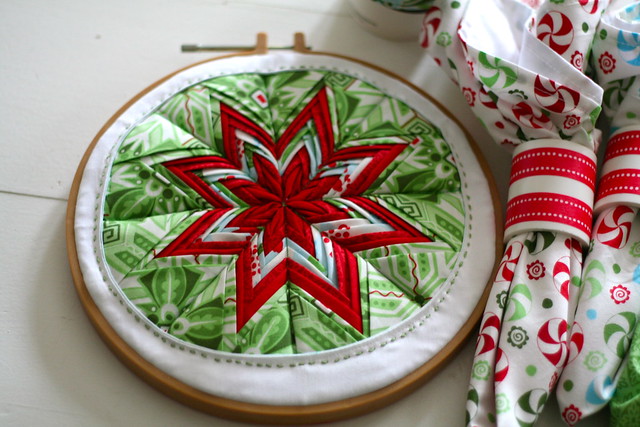
For those of you who've already finished christmas shopping, you might still have time to squeeze in some christmas sewing! If you haven't already tried making a Fancy Folded Star, now might just be the right time to make one for that hard to buy for relative, or maybe just make one for yourself? Make a Potholder, a Pillow or why not a little Ornament?


Here are a few beautiful Fancy Folded Stars I've found around the net to help get you inspired!

Look at this gorgeous one from hopefully {something} cute:


Or this stunning one by Made By Cola:


Or this tiny adorable ornament one by A Stitch In Between:


And this lovely one made by Karen over at Easy Patchwork:


Hopefully I've inspired you a little, if you make one, make sure you tag me on social media so I get to see it <3

Friday, November 18, 2016

Nordic Sewing and Inspirational Weekend - Post 1 of 2

I spent this past weekend in Jönköping at the biggest Sy- och Inspirationshelg in the Nordic countries. It was an honour to be invited to teach classes there and I hope my students had even half as much fun as I did! I have a ton of photos and so much to share I think I'll divide this into two posts =)

There was a lot of preparation, as half a day was removed from the Stockholm Bag class, I had to cut and interface all the bags for everyone in the class, which turned out to be a whole week of work! I'm so grateful for the help from my parents and my dear friend Ursula who also came along as my "help teacher" <3


It was a lot of fun to make the little kits for the Bring the Basics Bags, matching fabrics, zippers and zipper pulls was a blast!


Ursula drove me and Anki down to Jönköping on Friday the 11th with a very, very stuffed car, I was hidden in the back seat behind bag kits, and Husqvarna Epic sewing machine, ironing boards, cutting mats and everything else we would need for our weekend. We set up and made this cute little display table with some of the bags I've made.


The day after setup, we had a Stockholm Bag course, it was such a fun day but darn had I been nervous! I just really hoped everyone would have enough time to finish their bags. luckily everyone did a spectacular job and nearly everyone managed to finish their bags completely, some just had the topstitching left.

Everyone got a complete kit (in a cute pink baggy of course!) with all pieces ready cut, interfaced and labeled with their respective letters.


I'm so lucky to have had such fantastic students and help teacher, who's here helping to glue down handles.


Sewing interior pockets.

Sewing lining and exterior together.


And here's a few of the happy new Stockholm Bag owners with their stunning bags! <3


There were three different main "kits", one gray and turquoise as seen below, and three different faux leathers, one smooth, one pre-quilted in asymmetrical squares (like the original) and this version.


The pretty backside with a contrast zipper.


There was a green version with Tula Pink lanterns, very close to or exactly like the original depending on what faux leather it was combined with. This one had such a very cool decoration for the front and left her handles unsewn for a very cool and unique look!


And this pretty pink Tula Pink Chipper version modelled by it's owner, Ingrid Johnson, who has Husqvarnabutiken in Vimmerby. She also carries my patterns <3


I just also have to show you Ingrid and her friend Helena (who was holding classes in the room next to us), whom unknowingly to each other had sewn tops for the events in the same fabric, don't they look great!? And on Ingrid's shoulder is her gorgeous, matching Denver Double Zip Bag!


Thank you all for a fantastic Saturday! A post with photos from the Sunday is coming soon =)

Sunday, November 6, 2016

Denver Double Zip Bag - The Pattern!

I'm so happy to announce the arrival of my Denver Double Zip Bag pattern!

It's available in both Swedish and English in my webshop.


This little bag is perfect for a night on the town, when you want to have room for your phone, cards, money, keys, maybe a bit of makeup and some small bits and pieces. It's such a quick and fun bag to sew, you'll probably just like me, not only make one once you get started! Finished bag is ~8 x 5.5 inches big and ~1" wide at the bottom. Mine is made with Katarina Roccella Indelible Fabric Collection by Art Gallery Fabrics matched with a random text print found in my stash and a Michael Miller Cotton Couture solid.


It has two big zippered compartments, both fully lined. The main compartment also has a card holder for 3 cards, a lip balm and money slip pocket and a slip pocket for a cellphone.


But the pockets can of course be customized to fit your needs.


It's so very cute! I can't wait to make myself a black one to go with my LBD's!


I as always want to sincerely thank my lovely pattern testers! <3
They did amazing work, suggested tweaks, helped me with spelling and grammar and made such pretty versions of their own!

Ann-Kristin Kristoffersen of Kinnas Lappteknik made a gorgeous grey and blue flowery version! She's the inventor of the little double zip baggies that this bag design is born from <3


Anne Verberckmoes of Serial Bagmakers made a lovely paisley and purple version with a cross body strap instead, very practical!


Marita Tjulander of Valsan-Häxan syr/quiltar made a fetching black version in real leather! Such a lovely every day bag and such a cute kitty in the background!


Cate Sjöman - of C. Sjöman Designs made a super cute pink paisley one and a great version in quilted black! They really are addictive ;)


Jennifer MacWilliams of thisgirlissewdestructive on Instagram and Facebook, she made such a happy green version in Dear Stella Design fabrics! 


Friday, October 28, 2016

The Splendid Sampler Blocks 69 & 74

Yes, I'm very much behind, but at least I haven't given up? I'm only missing some 40 blocks ;-)

This one reminded me how much I dislike sewing anything more than 1/4 circles XD
It was a struggle and it came out wonky, I'm not a fan...


This one was fun and turned out so cute! I was hesitant about putting buttons on a quilt, however, decided to do it anyways. Need to step out of my comfort zone, that's really what this quilt is all about! I however sewed the handle separately by tracing the shape, and sewing two of them together and turning it. I like the somewhat 3D outcome of that, goes nicely with the buttons.


Thursday, October 27, 2016

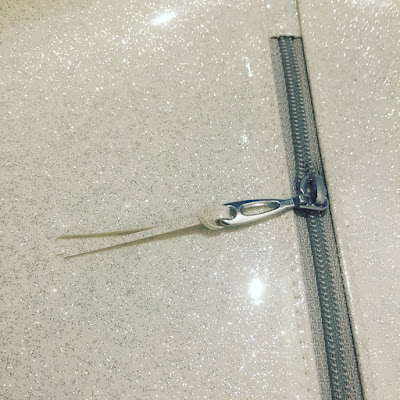
Sewing with Glitter Vinyl - Tips and Tricks

I thought I’d take this opportunity to just mention a few things regarding working with heavy vinyls such as the glitter one used for the white bag in my previous post. There's quite a few things you should know to make it a fun experience.


The first time I used it I hated it, it was so darn hard to work with and I regretted buying so much of it! However, now when I've taken the time to learn how to use it properly, it's such a fun material to work with!

  • Use a walking or teflon foot In my experience, on a domestic machine it’s often best to use a walking foot when working with these heavy fabrics as sometimes the teflon foot just won’t feed all the heavy fabric evenly. However, some machines can’t keep the presser foot pressure up with the walking foot, if yours is having tension issues when working with multiple layers of vinyl, try the teflon foot, up your pressure foot pressure and try again. It should hopefully solve the issue, if you need help troubleshooting tension issues or skipped stitches, here here: Skipped stitches and tension issues help


  • Use longer stitches This is to prevent perforating the vinyl to much making it brittle and liable to tear under a little pressure (don't ask me how I know!). I sew with at least a 2.5-3.0 stitch length, while I’d normally use 2.2 for sewing bags. Also, be careful and don't backstitch if not absolutely necessary as this will also perforate the fabric unnecessarily. Use the "auto lock" or similar thread fastening feature on your machine if you have, if not, be careful and try to backstitch exactly into your previous stitches.
  • Don’t use a leather needle You don’t want to use the leather needle for the same reason, it will weaken the vinyl as it cuts when perforating - making big holes and making the vinyl more likely to tear. I recommend using a topstitch needle as it has a bigger eye so your thread won’t break and it will catch the bottom thread to prevent skipped stitches - but it still makes neat holes. Choosing a 90-100 needle to handle the vinyl without risking it bending.
  • Don’t use pin, use clips When vinyl has been perforated the little hole won't close, so use Wonder Clips instead of pins when working with vinyl. If you can't use clips I usually use double sided sewing tape or a dot or two of glue to hold stuff in place until I can sew it down.
  • Don't iron - tape or glue If you've read some of my patterns you know how I love to use tape or fabric glue to hold stuff in place, when it comes to vinyl, this becomes a necessity as you can't press it. If you want a seam allowance to stay down, glue it in place. If you want a temporary hold - use tape, either double sided sewing tape, or even painters tape if you need a temp fix while working.
  • It sticks to everything, itself, your sewing machine bed, yes everything! Which is great in some instances but horrible in others. So if you don’t have one already, invest in a teflon baking sheet which you can tape to your sewing machine bed to prevent it from sticking to it, making jump stitches or preventing it from feeding at all when you have to sew with the vinyl down. But try to avoid sewing with the vinyl side down when possible.


I hope these little tips will make your vinyl sewing experience a bit more pleasant than my first few attempts =)

Tuesday, October 25, 2016

A little glitter baggy!

I'm home alone these past few days and I've set away plenty of time for sewing, and with me and my sewing friends going on a non sew vacation to Mallorca this spring, a challenge was put forth. To sew a bag just the right size to hold ones passport, cellphone and a bit of money of course. I had to start right away! I took some inspiration from the little double zip baggies I love to make. But while those baggies have exposed seams in the lining, this one doesn't, and it also has credit card pockets and an extra pocket in the lining =)


I'm making a pattern for it now, and it's just so much fun to sew! Really quick to make but make such a statement! =D It's the perfect step up from the Bring the Basics Bag, when you need to be able to bring just a little more (like your battery pack for playing Pokemon Go, nooo that was absolutely not taken into consideration here *lol*). It's also a very pretty party clutch. Especially in the glitter vinyl.

More photos will come when I have a proper camera again, mine broke and I've ordered a new one, however, they only shipped to Sweden so Erik is bringing it for me when he returns =)

Sunday, October 16, 2016

Giveaway WINNERS!

Thanks to everyone who entered my 1 year anniversary giveaway! <3
I really enjoyed reading all your sweet comments!

I sincerely hope to have more time to blog this year as it's a such a fun way to share my sewing love with the world, and your lovely comments really gave me a much needed boost!


The winner of the whole bundle and the blog giveaway is Kathy E.! Congratulations!!!


The winner of all my bag patterns over on Facebook is Charity Ravn! Congratulations!


The winner of a fat quarter of the Racoon Fabric in the color of their choice is skh51! Congratulations!


Thanks again to all who entered! <3

Saturday, October 8, 2016

Pink Pony Design - 1 Year Anniversary!

I'm so very happy to be able to introduce Pink Pony Designs brand new look, page and very own webshop today!
Which also happens to be our 1 year anniversary!! You can now buy my patterns directly from my store, no need to go to a third party site! I'm so happy and proud of my little company turning 1!


We naturally have to celebrate this wonderful occasion with a giveaway! 

There are three prize lots and three different ways to win!

1. One lucky winner will get all in the photo above by commenting here: 
1 Lovely Bali Snaps (40 5x5" squares of Bali batik from Hoffman Fabrics)!
2 Gorgeous Tula Pink Acacia Fat Quarters with the rare OOP Raccoons!
3 Sets of matching bag feet and zipper pulls in gold, silver and brass!

2. One lucky winner will get 1 of each of my bag patterns by entering on Facebook:
Comment on and/or share the photo to have a chance to win one of each of the Bring the Basics Bag, Stockholm Bag, Daytona Bag & Batala Backpack in the language of your choice, English or Swedish!

3. One lucky winner will get 1 FQ Tula Pink Acacia Fat Quarters with the rare OOP Raccoons on Instagram:
There one lucky winner who have tagged a friend or shared the photo will have a chance to win (1) Tula Pink Acacia Fat Quarter with the rare OOP Raccoons in the colorway of their choice!


How do I enter?
This giveaway is open to anyone worldwide, and it closes on Saturday 15th October,  5 p.m. GMT.

1. All you have to do to have a chance to win lot 1 is to leave a comment on this post:
If you are unsure if you're a no-reply comment blogger, please leave your email address with your comment so I can contact you if you win.

1 random winner will be chosen among the comments and you will be notified by email.

2. To have a chance at winning lot 2, pop over to Facebook:
Comment and tag a friend in the comment for a chance to win, share the photo for an extra chance.

3. If you wish to enter for a chance at winning 3,  pop over to my Instagram:
Comment and tag 2 friends in the comment,  repost the photo for an extra chance!

Best of luck to you all!

Monday, September 19, 2016

Ruffled Sleep Mask - A Free Tutorial

I'm back home with my sewing machine after a long summer in Sweden. It's so nice to be back to blogging and instagramming (which I honestly do more these days, yes I've gotten lazy). The long and very bright summer nights in Sweden made me start using a sleep mask during the nights. However, all those I found where either all in synthetic materials and didn't breathe at all, they where really uncomfortable in fit or from binding around the edges which left ugly marks on my face, or they were just plain ugly.

So I decided to make my own, cute Tula Pink one now when I'm finally back home with my sewing machine <3 I thought it really cute and slightly clever to use raccoon fabric for a sleep mask, on account of them having masks themselves ;) And as @sewperfectlyimperfect commented on Instagram, as they're nocturnal, it makes it even more perfect!


Materials Needed:

(1) 5x9" scrap of cotton exterior fabric.
(1) 5x9" scrap of cotton lining fabric.
(1) 5x9" scrap of cotton blackout fabric (if using light exterior and lining fabric you need this extra layer of a dark cotton fabric).
(1) 5x9" scrap of cotton or bamboo soft batting.
18" x 3/4" wide elastic  (or any elastic you have at home that is long enough to get it around your head, minus the mask).
30" x 1" wide silk ribbon for ruffle (or 2" wide strip of fabric) .
Template: https://drive.google.com/open?id=0Bw7OhV89tK5aOE9RX0hGVF8wRW8

Step 1 - Preparations
Print your template, just make sure your printer is set to not scale the document, but to print at 100% so that the template will be the correct size. Test by measuring the 1” line. 
Cut out all your 4 layers of fabric and batting from the template, seam allowance is included in the template. Make sure to center any design you want centered on your exterior piece.


Step 2 - Make the ruffle
Take your silk ribbon (or fold your cotton fabric in half wrong sides together and press) and set up your ruffler foot if you have one. I use the Janome Ultimate Ruffler foot so my settings are based on that, if you have a different one, try out your settings on scrap fabric or ribbon first. It might be safest to do so any way as each machine is a little different. 

I chose to have 1 ruffle with each stitch so as you can see in the pink circle, the selection is on 1. My stitch length was 4.0. I wanted semi deep ruffles so my depth screw is on the 4 as can be seen in the blue circle. Run through your ribbon with the needle hitting a scant 1/4" from one edge (or in the case of folded fabric, a scant 1/4" from the raw edges).


If you don't have a ruffle foot, use your favourite ruffle method, one excellent tutorial is available here if you're new to ruffles: http://www.seasonedhomemaker.com/how-to-gather-fabric-and-make-ruffles/

Step 3 - Attach ruffle
Fold your exterior fabric piece in half to get the center and use it to center your ruffle on the right side of your exterior fabric.  Place a ruler on top of your fabric and use it to make sure your ruffle extends equally far on both sides and"exits" your piece evenly. Pin or clip in place. Don't let your ruffles extend too far down, as then they could become uncomfortable when sleeping on your side. 


Sew in place with your walking foot, a scant 1/4" from edge and trim off any excess ruffle. 


Step 4 - Attach elastic
Place your elastic on the right side of your exterior piece, measure 1 1/2" (this measurement will vary depending on the width of your elastic, find one that looks pleasing and centered for you if using a different width of elastic) from the bottom of the piece and place it there, sew in place on one side on the cyan mark 1/8" from the edge. 


Place mask over your eyes and measure out how long your elastic needs to be for the mask to sit comfortably on your head (for me this was an exactly 15" long piece, including the seam allowance). Cut it off at desired length with a 1/4" seam allowance and sew in place on the other side too. 

Step 5 - Sew layers together
Layer your pieces as below. The reason we keep the layers in this apparently strange order is because we want the seam allowances gathered on the front of the piece so we don't get any uncomfortable bumps towards our face when we sleep.

Exterior fabric right side up 
Lining fabric wrong side up 
Blackout fabric 
Batting 


Sew together with a 1/4" seam allowance (making sure to keep your elastic out of the way when sewing, leaving about 1 1/2" opening where there's no ruffles or elastic for turning, the pink line in the photo below.


Cut little "V" shapes in the seam allowances along all curves to make turning smooth and easy. 

Step 6 - Finishing touches
Turn your mask through the opening (pull on the elastic, makes it easier) and sew the opening closed by hand using a ladder stitch.


Voila! All done! You have a beautiful, ruffled sleep mask! Sleep well.


If you make one, I'd love if you'd share it on social media using the #pinkponydesign and #ruffledsleepmask hashtags! And feel free to tag me on instagram @pink_pony_design and to share on Facebook <3

Saturday, June 25, 2016

Batala Backpack Hardware Kit!

I'm super excited to be able to tell you that the lovely Alison of Bobbin Girl has created hardware kits for the Batala Backpack! No need to scurry around trying to find all the hardware needed now, it's just a few clicks away, especially great since the big, 2" D-ring isn't available in all quilt or sewing stores. =)

The Batala Backpack pattern is available here in English and here in Swedish!


Bobbin Girl has hardware kits for a lot of popular bag patterns from many of your favorite designers as well as everything else you could possibly need for your bag making! Be sure to pop over and take a look at her lovely store!