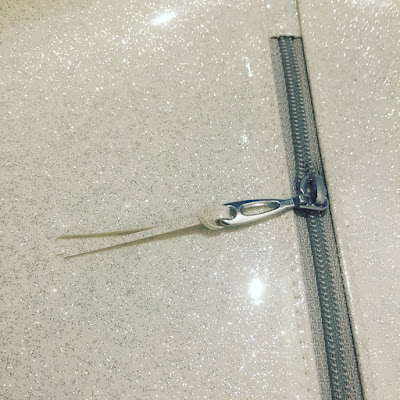
I thought I’d take this opportunity to just mention a few things regarding working with heavy vinyls such as the glitter one used for the white bag in my previous post. There's quite a few things you should know to make it a fun experience.
The first time I used it I hated it, it was so darn hard to work with and I regretted buying so much of it! However, now when I've taken the time to learn how to use it properly, it's such a fun material to work with!
- Use a walking or teflon foot In my experience, on a domestic machine it’s often best to use a walking foot when working with these heavy fabrics as sometimes the teflon foot just won’t feed all the heavy fabric evenly. However, some machines can’t keep the presser foot pressure up with the walking foot, if yours is having tension issues when working with multiple layers of vinyl, try the teflon foot, up your pressure foot pressure and try again. It should hopefully solve the issue, if you need help troubleshooting tension issues or skipped stitches, here here: Skipped stitches and tension issues help
- Use longer stitches This is to prevent perforating the vinyl to much making it brittle and liable to tear under a little pressure (don't ask me how I know!). I sew with at least a 2.5-3.0 stitch length, while I’d normally use 2.2 for sewing bags. Also, be careful and don't backstitch if not absolutely necessary as this will also perforate the fabric unnecessarily. Use the "auto lock" or similar thread fastening feature on your machine if you have, if not, be careful and try to backstitch exactly into your previous stitches.
- Don’t use a leather needle You don’t want to use the leather needle for the same reason, it will weaken the vinyl as it cuts when perforating - making big holes and making the vinyl more likely to tear. I recommend using a topstitch needle as it has a bigger eye so your thread won’t break and it will catch the bottom thread to prevent skipped stitches - but it still makes neat holes. Choosing a 90-100 needle to handle the vinyl without risking it bending.

- Don’t use pin, use clips When vinyl has been perforated the little hole won't close, so use Wonder Clips instead of pins when working with vinyl. If you can't use clips I usually use double sided sewing tape or a dot or two of glue to hold stuff in place until I can sew it down.
- Don't iron - tape or glue If you've read some of my patterns you know how I love to use tape or fabric glue to hold stuff in place, when it comes to vinyl, this becomes a necessity as you can't press it. If you want a seam allowance to stay down, glue it in place. If you want a temporary hold - use tape, either double sided sewing tape, or even painters tape if you need a temp fix while working.
- It sticks to everything, itself, your sewing machine bed, yes everything!
Which is great in some instances but horrible in others. So if you don’t have one already, invest in a teflon baking sheet which you can tape to your sewing machine bed to prevent it from sticking to it, making jump stitches or preventing it from feeding at all when you have to sew with the vinyl down. But try to avoid sewing with the vinyl side down when possible.
I hope these little tips will make your vinyl sewing experience a bit more pleasant than my first few attempts =)


We are Knitterbox Free Knitting Patterns, an online community that provides resources for knitters and crocheters. We would like to promote our Free Patterns page, and on that page you'll see a list of available categories for both knitting & crochet patterns.
ReplyDeleteThis comment has been removed by the author.
ReplyDeleteThank you for the post. I will definitely comeback. best mini sewing machine
ReplyDeleteYou there, this is really good post here. Thanks for taking the time to post such valuable information. Quality content is what always gets the visitors coming. How to clean vinyl siding
ReplyDeleteDigital marketing agecny
ReplyDeleteDigital marketing agecny
Digital marketing agecny
Digital marketing agecny
Digital marketing agecny
Digital marketing agecny
Digital marketing agecny
Digital marketing agecny
Digital marketing agecny
Digital marketing agecny
Digital marketing agecny
Digital marketing agecny
Digital marketing agecny
Digital marketing agecny
Digital marketing agecny
Digital marketing agecny
Digital marketing agecny
Digital marketing agecny
Digital marketing agecny
Digital marketing agecny
Digital marketing agecny
Digital marketing agecny
Digital marketing agecny
Digital marketing agecny
Digital marketing agecny
Digital marketing agecny
Digital marketing agecny
Digital marketing agecny
Digital marketing agecny
Digital marketing agecny