Saturday, July 23, 2022

ADD ON Flap Pack for Singapore Sling Bag!

I don't think it has escaped anyone here how much I LOVE the Singapore Sling Bag, so I really wanted to expand this pattern and allow for more fun and creative versions of it, hence this flap pack add on!

Get it here!


I have a full length youtube tutorial for the pattern here: 


4 new versions of the Singapore Sling Bag are now possible! 


Pointed Flap

Made in a super cool, reflective vinyl from Bob & Jen's Odds and Ends  you should see this bag in the sun, I have to make a little video! Beautiful Bow twist lock from Made By Lullan


Envelope Flap Envelope Flap - Style A  

Fits Emmaline Metal Edge Trim - Style A

Beautiful cotton fabric from BlendedThread, hardware from Emmaline Bags bought from Borlänge Sycentrum. Lining Oxford Canvas from Made By Lullan.


Envelope Flap - Style B

Fits Emmaline Metal Edge Trim - Style B

Gorgeous alcohol ink print cotton from Borlange Sycentrum, hardware from Emmaline Bags bought from Borlänge Sycentrum


Rounded Flap 

Made with absolutely stunning custom vinyl from Made By Lullan


~~~~~~~~ ♥ ~~~~~~~~ ♥ ~~~~~~~~ 


My amazing pattern testers were awesome as ever and tested the pattern for me, and they have done such an awesome job! A sincere thank you goes out to each and everyone one of you for helping me make each new pattern - into my best pattern yet!

I'm so very grateful for all your help and hard work, I could not do this without you!

Helena Halvar Tall - Whom can be found here on instagram made this beautiful version:


Margareth Tai - Bags by Mags can be found here on Instagram, made this lovely silver one:


Lisa Nyberget - of Kakankläder that can be found here on Instagram and here on Facebook made three fantastic versions!


Sofia Nilsson - of TRÅkärlek whom can be found here on Instagram and here on Facebook, made a bunch of  amazing versions, more photos to come: 


Wednesday, June 22, 2022

Looking for Pattern Testers!

I'm currently looking to add about 10 new testers to my pattern tester team! Please read below to see if this is something you're interested in.

What is a pattern tester and how do we work?

A pattern tester is someone who is involved in thoroughly reading, lightly editing, and sewing up a bag before the pattern is released. A pattern is not ready to be released until after they are tested by a number of sewists/bag makers. Pattern testers are an incredibly important part of the pattern writing process. As a group my awesome pattern testers are able to give the me a unique perspective on the pattern, catch any errors and can generate helpful feedback! You also get to sew my new releases before anyone else ;)

We work through my Facebook testing group to which you will get an invite to if accepted, I post when I have a new pattern in need of testing, a post with photos, description of the bag, the skills needed and what's needed to complete it along with a deadline for the test and photography of the bag. 
And then you just comment on the post if you wish to test that particular pattern, easy peasy! 


Are you interested in being a pattern tester, please ask yourself the following before submitting an application:

* Do you have the time? 
You will be given a specific time frame to for testing (usually 2-3 weeks). Many patterns are being released on a deadline, so it is important to be sure that you have the time to commit before you agree to test. You absolutely don't have to test each and everyone of my patterns if you become a pattern tester, however, participating in a couple of tests/year is requested.

* Do you have the ability to sew something less than perfect? 
This is important because, believe it or not, even experienced designers can mess up the numbers, write the wrong one or otherwise mess stuff up. And like when in this case, the pattern designer sometimes is very blonde, it's bound to happen. ;) 
 It is important to sit down and take a look at some numbers to make sure that they make sense before you start. Remember, the pattern hasn’t been published yet for a reason!

* Do you have a willingness to read slowly and very carefully as you go through the pattern to look for typos, grammatical errors, and inconsistencies in wording? 
As English isn't my first language, help with readability, understanding, grammar, spelling and wording is extra important for me. And for my Swedish pattern testers, as I work in English most of the time the the languages does get mixed up for me so help with, grammar, wording and spelling in Swedish is much needed too. Nitpicking is something I very much appreciate I love grammar police in my testers!

* Do you have some way to make notes as you work? 
And an ability to share those notes – whether you send the information in an email body, as comments in the PDF document, as an word document, or a scanned/photographed image of your neatly written notes on the printed pattern.

* Do you have the time to neatly photograph your bag after finishing? 
And are you willing to let me use such photos on my website, blog posts, social media and promotional material, always with full credit of course! 

You will receive 2 of my finished patterns as a thank you for each test you make.


Does this sound like it's for You?
Please fill in the following form before 7th of July:  


Thank you all for considering! ❤️

Tuesday, June 14, 2022

You can of course sew bags on a domestic machine!

I've been more and more often in groups on Facebook and around the net been reading comments such as:


"but if you'll be sewing more than a few bags, you'll need an industrial machine" 

"you'll need an industrial machine if you'll be getting into this hobby" (of sewing bags, my note).

And this is just not true!


These comments make me sad, as I fear it will discourage new bag makers from even considering taking up our wonderful hobby! As most people can't afford, or have the room for an industrial machine.


I just want to make it clear, you do not need an industrial machine to sew bags! 

I ran my business as a bag designer using only a domestic Janome Horizon 7700 up until three years ago! And trust me, I've sewn many, MANY bags. 


Before I bought my Janome I sewed my bags on a Husqvarna Emerald 118 for years - and that worked great too! And I still don't have a full industrial machine. I do work mostly on my Juki TL-2200QVP mini nowadays. But I always test sew all my bag patterns on my Husqvarna Opal 690q before I release, so I still sew on a domestic machine too. As all my designs are intended for the home or domestic sewists.


Yeah you will sooner or later likely run into issues if you have something similar to the Lidl or Ikea Singers, as they're not built to last and you can't do basic things like adjust pressure foot pressure on them, making them a poor choice for bag making. But any decent quality domestic that allows you to adjust pressure foot pressure and you can get a walking foot or teflon foot for, you can use for bag making! 


Thank you for listening and please don't hesitate to ask in the comments, in my Facebook group or in email if you run into any machine related issues when sewing your bags!  

Monday, May 9, 2022

Alternative construction of the Sendai Wallet - Fits A4 sheets of vinyl

 I've had a few requests making it possible to sew the Sedai Wallet from the very popular A4 sheets of vinyl available, so I've got an alternative method of construction here for you making that possible!

 This method is also for those of you who might find step 14 of the pattern a little tricky. This is the Sendai I made using this method. The interior is only slightly different, instead of folds, the middle section is separated to two pieces. Let's get started!


Alternative Construction - Sendai Wallet

The Sendai Wallet pattern is available HERE.

Please just supplement and/or replace the following steps in the pattern with the below. 

Please pardon the lack of buttons in the photos below, I didn't get the right ones til after I'd taken the photos. Please know that the following tutorial won't make sense unless you have the pattern at hand. 


Step 1 - Preparations

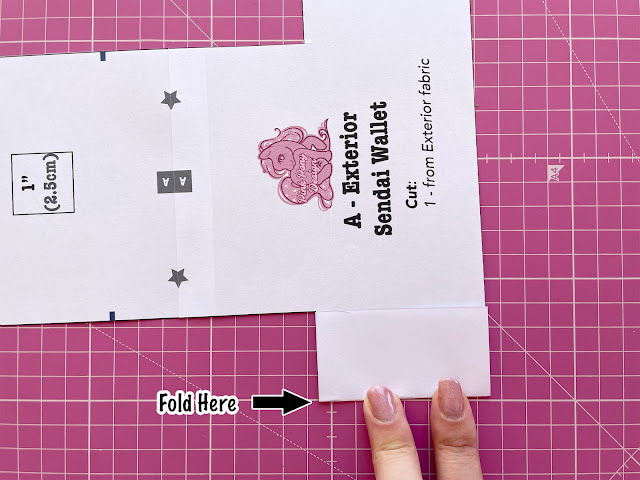
Fold the "wings" of the pattern template in half to mark the middle, and then cut them in half along the fold. 


You'll now be able to fit all of the exterior pieces into a single A4 sheet, so you can use such pieces of vinyl. 


Skip steps 10-11

Step - 12
Place your tape along the wrong sides of the long side of the loose "wing sections" instead and tape them in place just below the marks you make in this step according to the pattern (red marks). 


Step - 13
Sew down the taped sections carefully and slowly with 1⁄8” (2mm) seam allowance, leaving long thread tails when you start and stop so you can tie them off. Turn it over and sew from the back of your piece, so you easily can match your seam exactly with the seam already on the back. 


Step - 14
Fold your wallet in half with the lining side out and match up the raw edges of the "wings", clip in place. Sew together the"wing" sections carefully and slowly with 1⁄8” (2mm) seam allowance, leaving long thread tails when you start and stop so you can tie them off. 


It will look like this from above after sewing the wings, just turn the wallet right side out and you're done!


Tada!! You'll now have a beautiful Sendai Wallet! 


If you want to learn exactly how I apply the pretty, iridescent edge paint to this wallet, please see this video: 


Saturday, May 7, 2022

Sendai Wallet - Pattern Release!

The Sendai Wallet PDF raw edge wallet pattern is such a cute and quick make! The perfect mini wallet for when you only need to bring the essentials in a beautiful little clutch for a party, or why not put it directly in your back pocket? Also a lovely and quickly whipped up gift for anyone!


It's available in English and Swedish HERE.


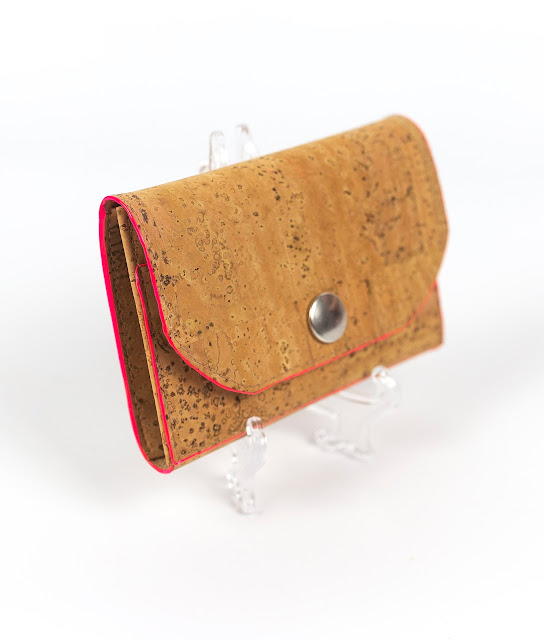
The little Sendai is such a fun sew, especially if you use the included SVG file and let your cutting machine do all the "hard" work. Perfect for cork fabric, vinyl, leather, faux leather, kraft paper and more!

It can be sewn unlined or lined depending on how stiff you want your wallet to be. The beautiful printed cork is from: https://www.frameyourbag.com/


A little video intro: 


I recommend that you don't do as I do, but instead do as I say - and do a lined version if you want to use edge coat, this was super tricky to get even somewhat nice on this without a lining. 


~~~~~~~~ ♥ ~~~~~~~~ ♥ ~~~~~~~~ 

My amazing pattern testers were awesome as ever and tested the pattern for me, and they have done such an awesome job! A sincere thank you goes out to each and everyone one of you for helping me make each new pattern - into my best pattern yet!

I'm so very grateful for all your help and hard work, I could not do this without you!


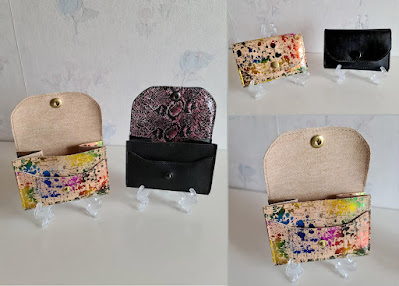
Pia Jestin - can be found here on Instagram made this lovely set of wallets:


Anne-Le Wängelin - whom can be found here on Instagram made these two lovely versions:


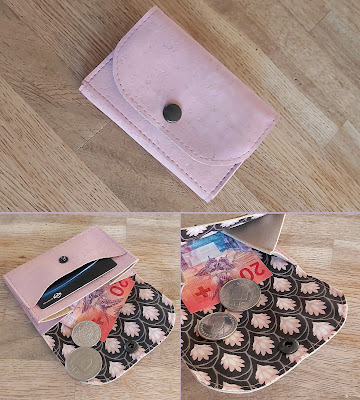
Ann Munthe Svensson - whom can be contacted here: ann.b.m.ams@gmail.com made this cute pink version:


Barbara Dörig - Whom can be found here on instagram made this lovely pink version:


Sheri Ferrano - of Munkee Made designs made these beautiful cork versions: