Showing posts with label Tips n' Tricks. Show all posts

Thursday, November 30, 2017

Soft handles for the Paris Purse

One of my lovely pattern testers, Pia Jestin whos beautiful works can be found here on Instagram decided that she wanted softer handles for her Paris Purse, so here's her tutorial for making Pia's Soft Paris Purse Handles. As you can see in the photo, this will give you a small section of padding outside the frames to make the handles a little softer to hold. Here is her pretty Paris Purse:


Cutting Instructions:
1/2" x 4 3/4" of your heavy fusible interfacing.
2 1" x 5 1/2" of your exterior fabric.

Instructions:
1. For the female part of the frame (with the opening), take two of your heavy interfacing pieces, in the middle of each, cut away a 5/8" x 1/4" big rectangle like in the photo . Fuse them centered to one of your fabric pieces like in the photo with a small, scant 1/8" opening between the two in the middle to allow for folding.


2. Make 1/4" long cuts in the fabric next to your heavy interfacing in the middle to allow you to fold up the fabric around the interfacing like in the photo, glue in place.


3. Fold up the short ends of your fabric over your interfacing and glue in place.


4. Fold in half lengthwise and insert into your frame. The little fold we made will allow the lock to be inserted without seeing any raw interfacing. 


5. Insert into the frame and screw in place. The padding will extend slightly below the frame to allow for a softer grip.


6. For the your male part of the frame, just place your interfacing without cutting out the middle like in step 1. Skip step 2 and just fold in the short fabric ends over the interfacing and glue in place like in step 3.


7. Fold the whole piece in half lengthwise to get the result in the photo. Cut out a little section in the middle to make room for the lock (no need to make the fancier covered openings here as it'll never be seen anyway). Insert and screw in place.


~~~~~~~~ ♥ ~~~~~~~~ ♥ ~~~~~~~~ 

 ♥ Thanks a lot Pia for sharing this with us, it's much appreciated!! ♥ 


Where to buy the Paris Purse & Bergen Bag frames

To make the Paris Purse or the Bergen Bag you need a special frame that's 7 1/2" (19cm) long. These are becoming more and more common but can still be a little tricky to locate. Here's a small list of where to find them.


United States: 
Sew Deja Vu - Silver, Brass, Gunmetal, Gold, Embossed
MeiMeiSupplies on Etsy - Gunmetal - Has more colors in store
YeahShop via Amazon - Brass

Belgium


Saturday, November 25, 2017

A beginners guide to double cap rivets & wristlet straps

Many budding bagineers (love that word!) are terrified of rivets before they've even tried them (so was I!) and some after having made a few failed attempts where the rivets come in wonky or bent - swear to never use them again. Which is why I saw the need for:

A beginners guide to double cap rivets


First and foremost you need the right tools for the job, something to make a hole for your rivets with like a hole punch or hole making pliers, a suitably sized rivet setter, a slightly curved anvil and a hammer. You actually don't need anymore expensive tools than this to set rivets prettily.


After having gathered your tools, you need to choose the right rivet for the job, and here this comes down to the length of the post of the rivet mainly.  Many people whom have tried using rivets and failed, have done so due to using a rivet with too long a post for the job. Resulting in bent posts and wonky looking rivets.

These three sizes where the ones I considered for my strap. As you can see, they only really differ in length with 1/16th of an inch generally, however, it makes all the difference!


Line up your possible rivet choices and take the part of the bag you're going to rivet, in my case that is a wristlet strap for a glitter vinyl Bring the Basics Bag. I made this strap exactly like in the pattern but made it about 16" long due to the raw edges when using vinyl and this method.

I fold up the fabric like it will be when I set the rivet and use this to measure out how long my rivet post needs to be, press your fabric together firmly when measuring as that's how it will be once we set the rivet. Like in the photo, the tip of the rivet should only precisely be sticking out. So for this job, the 3/8" long post was the right one to use, however I only rarely get to use such long rivets, the smallest post (4mm) is the one I use most often.


Next we make holes for our rivets, use your favorite tool, I'm making a strap so I threaded on my swivel snap hook and placed a hole 1/4" from the edge the strap, I knew I wanted my swivel snap hook 1" in from the edge so the next hole was made 1 3/4" from the end of the strap to get them at the same distance. Thread on your swivel snap hook.


Next I made the hole on the other end of the strap, this one will be placed between these two in the fold like in the second photo so this last hole was placed about 3/8" from the other end.


Next put your single hole end in between the two holes one each side of your snap hook and push through the rivet. This shouldn't be super easy, then the post is too long! Push it up and through like in the photo and then press on the little cap part of the rivet. Press until you hear/feel a click and the rivet cap stays in place without you holding it.


On the floor or table place your cutting mat (will absorb impact and protect the surface) and on top of it your little anvil. Place your rivet in the anvil and on top of it place your rivet setter. If you're working with rivets with a sensitive finish such as gold, gunmetal rivets or similar I recommend that you place a piece of scrap vinyl, foam or similar over and under it to ensure you don't accidentally scratch the rivet when you set it.  


Firmly and decisively (but not too forcefully!) tap the rivet setter with the hammer to permanently set the rivet. It's actually this easy! Just pick the right size rivet with a correct size post and you don't risk those bent and wonky rivets! If you feel uncertain about the amount of force to use, try it a few times on a folded up scrap. 


Voila! One very pretty wrist strap!


Friday, February 24, 2017

How to reattach a zipper pull - Video tutorial

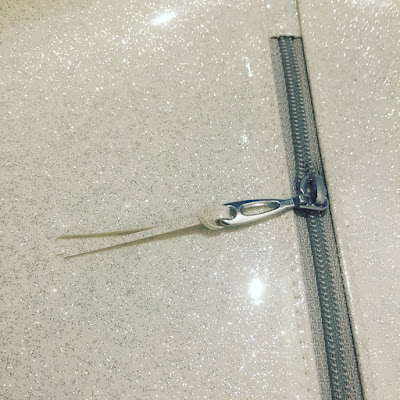
I've been contacted by several people who are very uncomfortable removing zipper pulls and reattaching them. Since I do so quite often in my patterns, for example in my free Racoon Case Sunglass Case pattern I thought it was long overdue with a proper video tutorial! It's also available in my youtube channel.


I love replacing my zipper pulls with contrasting ones or just prettier pulls, and while the first few attempts at this might be frustrating (and sometimes being two people can help), once you get the hang of doing this, it's actually really easy! And being able to remove the zipper pull makes working with zippers in so many instances so much easier =)

A few examples of where I've used contrasting zipper pulls, isn't it cute?


I hope you will find this tutorial easy to follow and that it will boost your zipper confidence!

Thursday, October 27, 2016

Sewing with Glitter Vinyl - Tips and Tricks

I thought I’d take this opportunity to just mention a few things regarding working with heavy vinyls such as the glitter one used for the white bag in my previous post. There's quite a few things you should know to make it a fun experience.


The first time I used it I hated it, it was so darn hard to work with and I regretted buying so much of it! However, now when I've taken the time to learn how to use it properly, it's such a fun material to work with!

  • Use a walking or teflon foot In my experience, on a domestic machine it’s often best to use a walking foot when working with these heavy fabrics as sometimes the teflon foot just won’t feed all the heavy fabric evenly. However, some machines can’t keep the presser foot pressure up with the walking foot, if yours is having tension issues when working with multiple layers of vinyl, try the teflon foot, up your pressure foot pressure and try again. It should hopefully solve the issue, if you need help troubleshooting tension issues or skipped stitches, here here: Skipped stitches and tension issues help


  • Use longer stitches This is to prevent perforating the vinyl to much making it brittle and liable to tear under a little pressure (don't ask me how I know!). I sew with at least a 2.5-3.0 stitch length, while I’d normally use 2.2 for sewing bags. Also, be careful and don't backstitch if not absolutely necessary as this will also perforate the fabric unnecessarily. Use the "auto lock" or similar thread fastening feature on your machine if you have, if not, be careful and try to backstitch exactly into your previous stitches.
  • Don’t use a leather needle You don’t want to use the leather needle for the same reason, it will weaken the vinyl as it cuts when perforating - making big holes and making the vinyl more likely to tear. I recommend using a topstitch needle as it has a bigger eye so your thread won’t break and it will catch the bottom thread to prevent skipped stitches - but it still makes neat holes. Choosing a 90-100 needle to handle the vinyl without risking it bending.
  • Don’t use pin, use clips When vinyl has been perforated the little hole won't close, so use Wonder Clips instead of pins when working with vinyl. If you can't use clips I usually use double sided sewing tape or a dot or two of glue to hold stuff in place until I can sew it down.
  • Don't iron - tape or glue If you've read some of my patterns you know how I love to use tape or fabric glue to hold stuff in place, when it comes to vinyl, this becomes a necessity as you can't press it. If you want a seam allowance to stay down, glue it in place. If you want a temporary hold - use tape, either double sided sewing tape, or even painters tape if you need a temp fix while working.
  • It sticks to everything, itself, your sewing machine bed, yes everything! Which is great in some instances but horrible in others. So if you don’t have one already, invest in a teflon baking sheet which you can tape to your sewing machine bed to prevent it from sticking to it, making jump stitches or preventing it from feeding at all when you have to sew with the vinyl down. But try to avoid sewing with the vinyl side down when possible.


I hope these little tips will make your vinyl sewing experience a bit more pleasant than my first few attempts =)

Friday, March 29, 2013

FMQ Feather Border & Stash Stack Club

I have been quilting a little when I haven't been able to sleep from cough. A very special little quilt this, but since it's going to be a gift, I don't want to show the whole thing until it's been gifted. But I'll tell you I'm loving this quilt and it will be really hard to part from it. After some practice I decided to go for FMQ feathers for the borders, all thanks to the help of the December tutorial from the FMQ Challenge, by Patsy Thompson.


It's not perfect but 100% freehand, the only marking I did was a line for the start and end and middle where the feathers meet and I'm super happy with the result of my first FMQ feather border =)

The brilliance of painters tape when quilting borders!
The painters tape was a new thing on my side, I hate quilting the borders because they tend to bunch up, get stuck and just be generally tricky to hold down nice and flat. With the tape I could mark off what would be hidden by the binding and at the same time tape the top to the batting to ensure I could easily quilt it all while it stayed in place. I will always tape the outside edges of my quilts before doing border designs from now on, makes life so much easier! =)

~~~~~~*~~~~~~

A little belated but I naturally received my Stash Stack Club for January & February =)

January was purple and all the fabrics where just so yummy! Delish! <3 My favorite is the second one from the bottom, Orchid Citadel - Cuzco by Kate Spain tightly followed by the top print, Leafy Stripe in Eggplant - Simply Color.


For February there was blue on the menu, some where oh so lovely - but I wasn't a fan of the bottom two. They felt like "grandma fabrics" (not judging my grandma here, she has fantastic taste, just your "typical grandma") with the yellowish white contrast and washed out look, not my cup of tea. I have to say, after 8 months I've receivd 2 fabrics that I didn't really fancy - this club is awesome! =D


Monday, December 10, 2012

Cutting corners isn't necessarily a bad thing

I was sewing up some pillows for the couch (that I started 6 or so months ago...) late last night and was cursing like crazy when the darn machine got stuck in a little seam as I was attaching the double fold binding. I cursed  quite loudly about the bloody thing needing service and continued sewing without thinking much more about it until I was done and stung myself on the reason for the machine getting stuck:


Very well sewn down was a green needle I apparently had forgotten to remove in my sleep deprived state ^^


My first mistake that night however later turned into awesome lesson was when I was cutting the binding, After cutting up my fat quarter I realized after cutting that I'd cut it to slim. Anyway, decided to wing it anyway and try to make it work (the way you  think seem like an excellent thing do at two at night, while you during the day just would have cut your losses and just cut up a new strips).

When I got to the corner I realized there was no way I'd be able to make it fold neatly over the corner with that little fabric, which is when I decided to try and cut off the corner to make it work. Which was such a brilliant idea if I may say so myself, thanks dear brain! Maybe this is something everyone already does so if I'm late to the party forgive me, but for me it was a pure "Eureka!" moment! I will now always cut of the corners of my quilts before folding over double fold binding, the corners where so easy to get neat!


Look how pretty they came! I mean, I can generally get a very decent result with a bit of hassle, but this was so easy peasy to get them that perfectly even! Front:


And back (and yes dear mum, you're seeing this right - I'm actually hand sewing this one, I'm feeling very grown up  ^^)


Will hopefully be done with the binding tomorrow so I can show you them completed, I'm not very fast with the hand sewing so even a little pillow is a big project for me in that area.

Thursday, December 29, 2011

Seam ripping

Hope everyone had a lovely Christmas! =)
Myself I pretty much slept for 2 days straight when Christmas was over and all releases on our games had been done and all had gone well. Can't tell you the relief I feel each year when the 25h is finally over. Not much Christmas spirit I know, but we did celebrate Christmas with our dear friends and had a lovely day with very good food and good fun. 

I got a package from Quilt Direct with some much needed supplies a day or so before Christmas, such as a brand new cutting mat (mine turned all bubbly from the heat this summer and I've been meaning to get a new one for 4 or so months...), some batting, new needles etc and the must urgent thing,  a brand new seam ripper.

So while others are thinking about the holidays, I've been thinking about the happiness that I feel when I rip the first seams with a brand new seam ripper. You know,  before it goes all dull from use?

While it's my most trusty tool (I'm embarrassed to admit it but I go through a couple in a year...), there are few things I generally  hate to do more then unpick seams. So when I learned a handier way of doing it last summer, my life became much easier! Maybe I'm the only one who didn't know this but before, I'd try and separate the fabric and rip the seams between the two layers, a really bad method which often resulted in holes in the fabric and much frustration.

Now I simply cut up every 4th or so stitch on one side of the seam like so, it's a bit hard to tell in the photo but you just cut up every forth seam.


And then you can just pull on the thread on the other side like so and you have a reasonably quickly and neatly ripped seam with minimal risk for fabric damage.=)

Wednesday, December 14, 2011

Free Motion Quilting on your home machine - a tip for less friction!

Tried and true, this is just the best!


I've read a lot about ways to make FMQ on ones home machine easier and the use of silicone on the sewing machine bed, or tools like the Supreme Slider. Despite really wanting to try the Supreme Slider, I didn't feel I could justify the purchase of something so expensive right now that I didn't know if it'd actually make a big difference for me or not. So I decided to try and find silicone spray that was safe for use on fabric instead. Just to see if it would make a difference - no luck. This is Malta and no one had heard of such a thing and looked at me like I was crazy when I asked around XD

So while ironing down some appliqué shapes, I realized I had a Teflon sheet in my hand and yes, it was super slippery of course! The light went on and I decided to try and use it to make my own Teflon slider! I just made a small hole for the needle with my paper scissors and taped it down with some painters tape (leaves no residue, really easy to lift to change bobbin and cheap) and I gave it a go. Really wish I'd known what a difference it would make from day one! It sooo much easier to FMQ when the quilt doesn't drag or snag! I've used this sheet for my last two quilts and I'll never FMQ without it again that's for sure!


So I really recommend trying this if you FMQ on your home machine, it really made a world of difference, not just in result, but also in how tired my arms, neck and back got. When I get a chance I'll probably buy a supreme slider but for now, this sheet is my best friend! =D

Saturday, September 24, 2011

Warm & White VS Warm & Natural Batting

Since my progress is really slow as of late I thought I'd show you something that is quite important when choosing batting and something I wish I'd known when making my first quilts. Maybe I'm the only one who didn't know this but I figured  if I could save one person from making my mistake, it'd be a good thing =)

I use the Warm Company's batting because I love the way fabric clings to it, it's 100% cotton, easy to work with, not too heavy and can be quilted so far apart (10"). Warm & Natural, which also is the batting I used for my first quilts (which I now regret but back then I didn't know any better) versus the Warm & White batting which is the only one I use nowadays really except for when making trapunto as that's when I use up my leftover Warm & Natural. =)

The Warm & Natural is a fantastic batting, please don't get me wrong but I didn't know that it "gives an antique look" which is somthing I really  don't want for my quilts. So my first quilts I made now have a yellowish tint to all the white parts that I don't like... :(

Anyhow, so I thought I'd show you the difference between the Warm & White and the Warm & Natural as it shows on the back of my pillow, and this is "fresh" (don't have a better word for it) Warm & Natural, I have other pieces which have become much, much more yellow:


So I guess what I'm saying is, if you don't want the "antique" look, make sure you choose Warm & White =)

~~~~*~~~~

Fancy Folded Star - Machine Wash Me! ^^

On another note, some people have expressed worry about using their Fancy Folded Star Potholders in the kitchen, I just wanted to assure you that they can be machine washed without any loss of shape as long as they have been properly sewn down like I showed in the tutorial. 

I made this set 2008, like you can see from the photos date info and the extremely nice binding (please note the sarcasm), this is when it was newly made ^^


And here it is today in all it's currently very dirty state (which will be fixed by a machine wash today ^^) as I still use it. Please note that enlarging the photo below is done "at your own risk" as I dug it out from the laundry basket for this photo, which Diana uses as her personal daybed, hence all the cat hair, I don't have all that hair in my kitchen I promise =)


Sunday, January 16, 2011

Why do you keep erasers in your quilt supplies?

Is a question I got while we where unpacking our new place and a number of erasers fell out. Well apart from being handy when removing marks from fabric it has another great use:

When working with and cutting fuzzy fabrics like flannels and brushed cottons, my cutting mat quickly gets deep ridges in it with little threads of fabric. These are very annoying and quickly makes it hard to cut and they're very annoying to get rid of by hand. Then one of my handy erasers gets brought out and a quick rub over my cutting mat it does wonders, and even if it's if not as good as new, it's very much usable again =)