Friday, March 1, 2019

Singapore Sling Bag - Pattern Release!

I've been so EXCITED for today! The Singapore Sling Bag is finally released! And I can't wait to see your version!
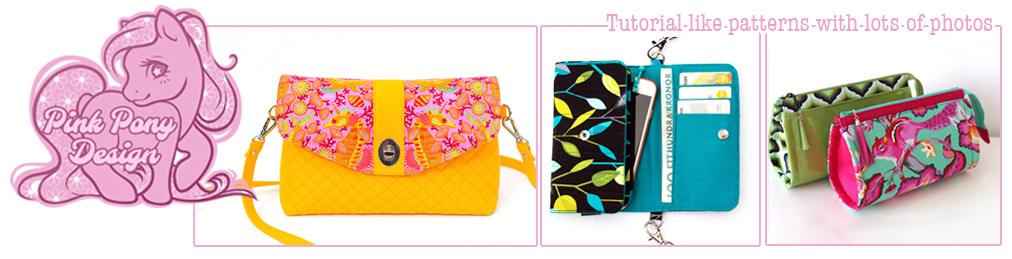
The Singapore Sling Bag is the perfect everyday handbag, super stylish and just big enough for all the necessities. It has a zipper pocket in the lining which you turn the bag through, as well as open slip pockets. The gusset free design makes it super easy and quick to sew, you'll easily make it in an afternoon. And if you're like me, you'll be making more than one!

The Singapore Sling Bag pattern has both INCH and CENTIMETER measurements and is available in both English and Swedish HERE.


I love this design soooo much! Literally it's the most ME bag I've ever designed, I think it even wins over the Denver Double Zip Bag as my new favourite everyday bag (and I have over 10 of those for my own personal use, so that's not saying little *lol*).

This bag is sewn with Tula Pink's GORGEOUS Zuma line, the little unicorn seahorses of the "Sea Stallion" print are just so adorable and I love them, they fit so beautifully on the flap! The exterior is a matching cotton solid I quilted and the lining is the "Sea Shells" print from the same line. 


The back is simple and smooth.


Here is where the magic happens! This zipper pocket is not your average zipper pocket! It's oh so discreet and is made in a different way to let you avoid the regular zipper openings, which so often for the beginner bag maker can turn out uneven.


Of course there are sea stallions in the zipper pocket lining too!


It's just the perfect size for an everyday bag:
 ~6” (16cm) high, ~9” (23cm) wide and ~2 ½” (6.5cm) deep at the base. 


I have a hard time deciding if I prefer the blue or the yellow one, both makes me sooo happy! So once my sewing room is unpacked I'll have to make another one so I have even more difficulties to choose for sure! 


~~~~~~~~ ♥ ~~~~~~~~ ♥ ~~~~~~~~ 

As always, this pattern wouldn't be a reality without my amazing pattern testers making sure everything is absolutely perfect before the release!
 
Thank you all!  Here are their gorgeous bags.

Tania Chanroux - of Smart Made Designs on Instagram made this breathtaking faux leather and cork version! You can't help but smile when you open this bag I think, such a perfect lining choice!


Noor Rats - Whom can be found here on instagram made this absolutely stunningly beautiful faux leather and cotton Cotton and Steel version! 


Pia Jestin - can be found here on Instagram made this classy, beautifully quilted cork and cotton version! Look at those freemotion quilted wood patterns, so stunning!


Annette - Made this absolutely insanely cool faux croc skin version! The choice of a chain strap makes it even edgier and I love it!


Eva Arthursson - made this absolutely gorgeous faux leather and cotton black and turquoise version! Such a classy looking bag. 


Cheryl Wright Simmerman - of Adarra Handmade with her usual amazing speed made not one, not two but THREE gorgeous versions! One stunning  quilted cork flamingo one (oh so me!) and one super fancy, pink sequin version and a beautiful, all cotton one - making beautiful use of the Effervescence border fabric! 


Becky McCoy - of Simply Memorable Bags made this super pretty, bright and cheery all over quilted cotton version! 


Ann-Kristin Kristoffersen - of Kinnas Lappteknik made this insanely sweet suede and cotton version with the most adorable lining! 


Marita Tjulander - of Valsanhäxan Syr/Quiltar made this  gorgeous faux leather and suede version! Doesn't it just look so expensive?


Michelle of MEW Designs Australia - whom can be found here on Instagram and  here on Facebook made this super cool gold and blue version! Love the perfectly matched Alison Glass lining!


Anja - whom you can find on instagram here made this stunning cork version, can you believe it was her first time working with cork, and her first time installing a turn lock!? Me neither!


Anette - Made this beautiful denim version, and look at that quilting, soo pretty! She used her embroidery machine for it, I think that was a brilliant move!


Thursday, February 14, 2019

A new look and a new bag!! Singapore Sling Bag pattern is in the works!

I wish I had the right words to tell you how much I love my newest design - the Singapore Sling Bag!! But maybe I should just settle for the fact that I almost slept with it in the bed the first night! This is also what I'm quilting in the previous post.

This design is so much me it's insane! Perfect small size, super fancy looking, perfect over the shoulder or as a little bag over your arm as I prefer to carry mine. It's soo much fun to make and it looks great quilted! This one is made in vinyl and cotton, the gorgeous print is called Terra Viva by @studio_e_fabrics. It has a new style of zipper pocket that I will tell you more about later so the interior will have to wait a little!

This beauty is with my amazing pattern testers right now so on the 1st of March it will be available to the public! It's Fat Quarter friendly, you only need 3.


It's also been long overdue to update my header and freshen up the feel of the blog, I'm ashamed at how long it's been. But with blogger refusing to use full quality pictures for this (the need to have a 900px image in a much larger space annoys me!) but now I finally have a bright new look. And if you look closer, you'll get the first sneak peek at my newest design in the pattern version, the Singapore Sling Bag - Tula Pink Zuma version! ;)


The Bring the Basics Bag just had to remain as it was my very first pattern for Pink Pony Design and it's my most sold pattern to date, and I had to include the Reno Rounded Makeup Bag as it's one of my runner up most sold patterns. And the latest Singapore Sling Bag just had to be there to show it off - as I love it so much it's ridiculous!

Saturday, February 9, 2019

Straight Line Quilting - with Painters Tape

When I straight line quilt I don't use chalk or pens to mark my lines, it's just to time consuming. Instead I use good quality painters tape to mark the lines. First, join your fabric to your desired interfacing, you can use something like 505 basting spray (I use that spray glue when quilting up to queen size quilts on my domestic machine), or for bags (especially cotton) when I want that extra stiffness/stability - I use a fusible web. If you use cotton fabric, I recommend something like Heat n Bond Light to join your fabric to the interfacing if it isn't fusible. 

I used by Annie's Soft and Stable in this bag, as I want that beautiful puffiness for the squares that you can't get with any other interfacing. But there's several great options out there. Use your walking foot for quilting, to make sure all layers feed evenly.

To start I just lay my ruler across what I'm to quilt at a pleasing angle and place my tape along it's edge. Then I sew the first line edge to edge with the tape with my walking foot. When I then have a stitched line to go after I just re-stick the tape along the seam line.  This is why you want good quality painters tape, the good quality I can re-stick 10-15 times, while the bad one maybe 3-5.

If you can't find tape in the desired distance for your lines, stick it on a baking sheet or just on your cutting mat and just cut it to the desired width. This one I cut down to 1/2".


When quilting, make sure you lengthen your stitch for the most beautiful result, something like 3.5-4-5 is usually very pretty. Test on a scrap of your fabric before starting.  And then you get this gorgeous texture! So next time, don't hesitate to go for some straight line quilting, it's so much faster with painters tape! 

This is also a little sneak peek at my new pattern in the works.


Sunday, February 3, 2019

New York City Bag - Pattern release!

I'm so happy to be able to release this clever bag! The New York City Bag is the perfect big city companion! You can wear it around your waist or across your shoulder as needed for security and comfort. You can choose to be hands free with your valuables safely towards your body. It's available in two sizes, small and large.

The New York City Bag pattern has both INCH and CENTIMETER measurements and is available in both English and Swedish HERE.


This is the small version of the bag, it's sewn all in cotton and the pattern uses foam interfacing. 
It's very light and retains it shape so well. I love how comfortable this bag is to wear.

The interior is fully lined and you can easily choose to add a slip pocket or why not even card pockets?

The back has a zipper pocket for your valuables. 

The small bag is ~6” (16cm) high, ~9” (23cm) wide and ~1 ¾” (4.5cm) deep at the base.


While the large bag is ~7 ½” (19cm) high, ~9” (23cm) wide and ~1 ¾” (4.5cm) deep at the base. It's sewn in black and gold cork fabric and lined with cotton. 


It fits more than one would think, and I love the gold and blue bubble cat fabric in the lining, got it from my mother at Borlänge Sycentrum =)


~~~~~~~~ ♥ ~~~~~~~~ ♥ ~~~~~~~~ 

As always, this pattern wouldn't be without my amazing pattern testers! 
Thank you all!  Here are their gorgeous bags.

Annette - Made this stunning Disney version! Perfect for those visits to the Magic Kingdom when you want your hands free and valuables safe. She chose to add a slip pocket to the bag.


Barbara Dörig - Whom can be found here on instagram made this super cute dotted one, with the most stunning flamingo lining! She also opted for a slip pocket in the back of the bag. 


Cheryl Wright Simmerman - of Adarra Handmade made TWO beautiful bags! I love how she mix and matched the outside for the pretty cork version, and that red vinyl and black one is just so darn cool! She used the card pockets from the Loule bag for the red one, brilliant move!  


Eva Arthursson - made this awesome faux leather one, I love the dotted surface and those grey straps goes so perfectly with the binding!


Gillian Woronko - made this awesome denim look one. To match the binding with the lining was such an awesome idea! So beautiful!


Lori Peoples - whom can be found here on Instagram made this super cool cartoon print version! 


Michelle of MEW Designs Australia - whom can be found here on Instagram and  here on Facebook made this super delish looking (I can't be the only one wanting a candy cane after seeing this beauty?) version. The striped binding is pure perfection!


Pia Jestin - whom can be found here on Instagram made this super pretty furniture fabric version, so stylish! Love that she also matched the binding with the lining!


Anette Lundin - made this super pretty paisley version! She added a safety strap for her card holder, such a great idea!


Kristin - whom can be found here on Instagram made this stunning knitters version! Love the red biding, makes such a perfect contrast! 


Wednesday, January 16, 2019

Baby Ebbas Thicket Quilt

My sister Anna had her first baby this august, an adorable baby girl named Ebba. She's the love of our entire family and naturally I had to make her a quilt! It's made in Katie and Birdies beautiful Lullaby fabric line matched with Kona Cotton in white. It's based on the free Thicket quilt pattern available here.


I'm super happy with how the appliques turned out, they're all trapuntoed by adding extra batting behind the animals to make them protrude a little extra from the quilt, and make them more appealing to a baby. If you want to know how I do this, it's described in my Summer Squares tutorial on Moda Bakeshop: http://www.modabakeshop.com/2011/06/summer-squares-quilt.html 


And below comes the little fellow that started it all, the fox! Baby Ebba got a small fox toy some six months before she was born from her parents - and it disappeared when me and Erik visited! There was a lot of investigation surrounding (and allegations I might add!) this and I decided I had to make a quilt featuring the fox, should it not turn up. 

I looked for several months for the perfect fabric for this quilt (my sister and her husband have fantastic taste and I didn't want to make something they'd feel didn't work in their beautiful apartment) and when I stumbled on Katie and Birdies beautiful Lullaby line, I knew that's the perfect one! Of course it was out of print and near impossible to find someone who would ship to Sweden! I found a layer cake and ordered it to my mother's place. It arrives and when we're going to our quilt retreat this summer - it turns out it was only the border fabric that had arrived, not the layer cake! The horror! 

Me and my mom made another quilt for baby Ebba in the meantime (the one with only Kona Cotton and the applique baby feet if you've seen my social media). A number of months later, after Ebba was born, the layer cake just suddenly shows up in the post! And this quilt could finally become reality! Luckily the fox toy had been found by then ;)


The after much auditioning of different animals, the hedgehog and bunny was included because there's adorable such on the fabric, and they're too cute not to be included with the fox. 


The bunny being assembled, you can also see a little of my "pretty" bunny sketch in the background. Luckily I'm much better at sewing than drawing.


When making this quilt, this was the first time I sewn a full quilt on my beloved Juki 2200 QVP mini (that I just realized I haven't introduced here yet, ohhh gosh!), and I'm so happy with how it was to work with. Sooo easy! Sooo much space! I'll make a proper post with a review of this machine shortly. As "what machine do you use" is one of the most frequently asked questions for me.  

The back turned out great too, and the little animals show so sweetly.


Freemotion quilted it with all over swirls with hearts thrown in for extra love for baby Ebba.


Anna says they all love the quilt, and honestly - nothing could make me happier to hear! =D 

Saturday, December 29, 2018

Setting your seams - or how to get those perfectly flat quilt blocks

I published a photo of a quilt block I'd sewn, and I got quite a few private messages on Instagram asking me how I get my seams so flat, so I made a little video to show the importance of setting your seams, and how to do it. This is the photo that I posted, a cute simple square in a square with fabric from Kate & Birdie and Kona Cotton.


I highly recommend clicking the "Watch on Youtube" link in the video as this low quality won't allow you to see what I'm talking about. Video is available here: Watch video.

When we sew quilt blocks, we usually do not sew with a dual feed presser foot, which causes a slight stretch/tension in the fabric on top compared to the fabric being fed at the bottom by the machines feeders; which is why the top piece usually comes out longer than the bottom one, despite being totally equal in length when the seam was started. This causes the fabric, when the seam is sewn to have a slight "waviness" to it, as the fabric has been stretched slightly. This can be made worse from improper thread tension. Adjusting your presser foot pressure (usually reducing it) so your seams come out as flat as possible, while still retaining enough pressure to make a nice seam will help this. However, a slight waviness is difficult to get rid of.  Starching your fabrics with spray starch before you cut it is a great way to reduce this issue too. However for baby quilts such as this one, where you don't wish to spray the fabric with a bunch of chemicals is not desirable. This is where setting your seams come into play.

Setting your seams is something the old school quilters amongst us will say is such a standard thing to do that it doesn't warrant a post, but I've found a lot of new quilters don't know to do this, and it makes such a difference!


Set your seams: 
Start with your block in the same position as when you lifted it from your machine, don't open up the fabrics, just lift it from the bed to the pressing table. Here you can see the little waves in the fabric.


Put your iron on the cotton setting. With or without steam is a personal preference, have you pre-shrunk your fabrics properly with a hot iron with steam, you can use steam here to without danger to distort your block. Set down your iron on the block and give it a good press. Here you can see how flat it becomes, the waviness is gone!


Next press your block like you normally would (I'm pressing the seams open here which I normally don't, as it's for a baby quilt so I want it as flat as possible).


And enjoy your perfectly flat, beautiful block!


In the video there's a comparison with a block with the seams not set. Leave your blocks to cool flat on the ironing board, preferably even under a heavy book or a quilt ruler to let the fibers set in place flat before moving them.

Hopefully this will help you to get your blocks properly flat and beautiful!

Sunday, December 2, 2018

Periodic Table of the Elements fabric - now available for order!

After I showed my Periodic Table of the Elements quilt I made for my beloved sisters graduation 2012, I have received so, so many requests to have the fabric I designed for this made purchasable through Spoonflower. It was a very personal quilt this, so I was hesitant to do this for that reason, but now, 6 years later - I've finally edited, updated and uploaded the design! It's now available on Spoonflower for anyone who's interested: https://www.spoonflower.com/en/fabric/8232173


The original has been corrected and all elements have been added (no more Uut, Uuq etc) and the slight design issues with the elements not lining up perfectly (especially in the Lanthanoid and Actinoid series) have been fixed. It's the perfect gift for the science interested in your life!


There's a 1/4" space between each element and they're ~5 5/8" x 4 3/4" big. How big your finished quilt will be will depend on your seam allowance and how you place the Lanthanoid and Actinoid series.


This is how your 3 yards will look when they arrive, you need to buy 3 yards to get the full design, the layout have been optimized for minimal yardage so you need to cut it up and sew it together to make the quilt (it's not a printed panel quilt).


This photo gives you a nice idea of the feel of the quilt I think, for more photos, see the original post.


If you order this fabric, I'd LOVE to see what you make, so make sure to tag me in social media!